Queen cakes are a delightful piece of culinary history, a treat that has graced English tables since the 18th century. These dainty bakes, rich with butter, sugar, and currants, have evolved over centuries yet remain a symbol of traditional British baking.

Whether enjoyed with a cup of tea or served as part of a celebratory spread, Queen cakes have a charm that transcends time.
It’s no coincidence that these cakes bear the regal title “Queen.” Their origins date back to a period when the monarchy heavily influenced culture, including cuisine. Today, we’ll take a closer look at the fascinating history of Queen cakes, their evolution over the years, and how you can recreate an authentic 18th-century version in your own kitchen.
A Royal Connection: The Origins of Queen Cakes
Queen cakes first made their appearance in English cookery books in the early 18th century. The earliest known recipe comes from Robert Smith’s Court Cookery: or the Compleat English Cook (1724). These cakes were likely named to honor the reigning monarchs of the time, reflecting the British tradition of associating food with royalty.
Smith’s recipe calls for simple yet luxurious ingredients: butter, flour, sugar, currants, mace, and orange flower water. The method is straightforward, relying on hand-mixing to create a dense yet flavorful batter. His instructions emphasize the importance of using clean, high-quality ingredients—a standard for any dish meant to grace a royal table.
Evolution Through the Centuries
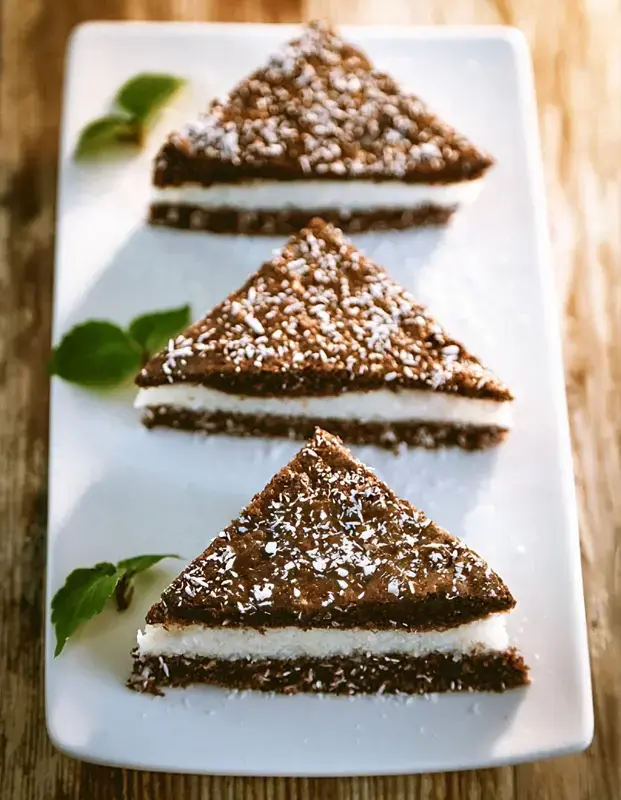
As with many traditional recipes, Queen cakes have undergone changes over the years. By the 19th century, dedicated Queen cake tins began to appear. These tins came in various shapes—heart, clover, triangle, and round—adding an aesthetic touch to the already charming cakes. However, earlier recipes didn’t specify special tins; cooks often used what they had on hand, such as patty pans, tea cups, or saucers.
Cookbook author Mrs. Eliza Rundell (1806) offered two variations of Queen cakes: one flavored with rose water and currants and another with grated lemon rind, omitting the currants. This flexibility in flavorings highlights the adaptability of the recipe to suit individual tastes and available ingredients.
By the early 20th century, Queen cakes had become more versatile, with recipes offering different flavorings and toppings. Some versions omitted currants entirely or sprinkled them on top rather than incorporating them into the batter. This evolution suggests that “Queen cakes” became a term for various small cakes, much like modern-day cupcakes or fairy cakes.
The Unique Characteristics of Queen Cakes
One of the defining features of Queen cakes is their flavor profile. Traditional recipes often include orange flower water or rose water, lending a subtle floral note that sets them apart from other baked goods. Mace, a spice derived from the outer covering of nutmeg seeds, adds a warm and slightly peppery undertone.
Another hallmark is their texture. The batter is dense compared to modern cake recipes, resulting in a firm yet tender crumb. This structure allows the cakes to hold their shape even when baked in cookie-cutter-style molds without a base.
Currants are a key ingredient in most historical recipes, adding bursts of sweetness and texture. However, they can be adjusted or even omitted based on personal preference.
Baking Your Own 18th-Century Queen Cakes
Ready to try your hand at these historical treats? Here’s an adapted version of Robert Smith’s original 1724 recipe:
Ingredients (Makes 20–22 cakes):
- 250 g soft butter
- 250 g raw cane sugar (reduce to 150 g if you prefer less sweetness)
- 1/2 tsp ground mace (use freshly ground for better flavor)
- 2 tsp orange flower water
- 250 g currants (soak them beforehand for plumper results)
- 250 g flour
- 4 eggs (separate yolks and whites; discard one white if desired)
Method:
- Prepare Your Tins: Generously butter and flour small cake tins or cookie cutters (about 5 cm wide). Alternatively, use patty pans or small molds lined with baking parchment.
- Preheat Oven: Set your oven to 160°C (320°F).
- Cream Butter and Sugar: Beat butter and sugar together until light and fluffy. Add orange flower water and ground mace.
- Incorporate Egg Yolks: Add egg yolks one at a time, mixing thoroughly after each addition.
- Mix in Flour: Gradually sift in the flour and mix well. The batter will be thick—don’t worry; this is normal for Queen cakes.
- Fold in Currants: Use your hands to gently fold in the currants for even distribution.
- Whisk Egg Whites: Beat egg whites until stiff peaks form, then fold them into the batter using a spatula for a lighter texture.
- Fill Tins: Use a palette knife or butter knife to transfer the batter into your prepared tins, spreading it evenly.
- Bake: Place tins on the middle rack of your preheated oven and bake for 30 minutes or until golden brown with a domed top. A flat top indicates underbaking or overmixing.
- Cool: Allow cakes to cool in their tins for 2 minutes before transferring them to a wire rack to cool completely. Dust with icing sugar before serving for an elegant finish.
FAQs About Queen Cakes
1. Can I use self-raising flour instead of plain flour?
Yes! Self-raising flour can be used if you prefer a lighter texture. This adaptation became popular in the 19th century and works well for modern bakers.
2. What can I substitute for orange flower water?
If you don’t have orange flower water, you can use vanilla extract or almond essence for a different but equally delicious flavor profile.
3. Do I need special tins to bake Queen cakes?
No special tins are required! You can use patty pans, tea cups, or even cookie cutters placed on baking parchment for an authentic touch.
4. Can I reduce the sugar?
Absolutely! Traditional recipes use equal parts sugar to butter and flour, but you can reduce the sugar to suit your taste without compromising the structure of the cakes.
5. How should I store Queen cakes?
Store them in an airtight container at room temperature for up to three days or freeze them for longer storage. They’re best enjoyed fresh but still delicious after a day or two!
A Timeless Treat Worth Revisiting
Queen cakes are more than just a recipe—they’re a glimpse into culinary history and a testament to the enduring appeal of simple yet flavorful bakes. Whether you’re recreating an authentic 18th-century version or experimenting with modern twists, these dainty cakes are sure to bring a touch of elegance to any occasion.
So why not channel your inner royal baker and give these timeless treats a try? With their rich history and delightful taste, Queen cakes are bound to make you feel like royalty with every bite!
Print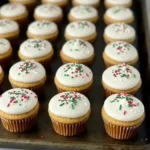
18th century queen’s cake recipe
- Prep Time: 20 minutes
- Cook Time: 30 minutes
- Total Time: 50 minutes
- Yield: 20–22 cakes 1x
- Category: Dessert
- Method: Baking
- Cuisine: English
- Diet: Vegetarian
Description
Transport yourself to the 18th century with these dainty Queen Cakes, a delightful treat flavored with mace and orange flower water, and studded with juicy currants. Perfect for tea time or as a nod to royal traditions, these classic bakes are a taste of history brought to life in your kitchen.
Ingredients
250 g soft butter
250 g raw cane sugar (reduce to 150 g if preferred less sweet)
1/2 tsp ground mace (or mace blades ground in a mortar)
2 tsp orange flower water
250 g currants (soaked, if possible)
250 g flour
4 eggs (separate yolks and whites, discard 1 white if desired)
Instructions
1. Prepare the Tins:
Butter and dust with flour small cake tins or cookie cutters (approx. 5 cm wide).
2. Preheat the Oven:
Preheat your oven to 160°C (320°F).
3. Cream Butter and Sugar:
In a large bowl, cream the butter and sugar until light and fluffy, as you would for a traditional pound cake.
4. Add Flavoring and Egg Yolks:
Grind the mace blades in a mortar. Add the mace and orange flower water to the butter-sugar mixture. Beat in the egg yolks one at a time until fully incorporated.
5. Mix in Flour and Currants:
Sift the flour into the mixture and combine thoroughly. The batter will be thick and dry—use your hands to mix if needed. Fold in the currants.
6. Whisk Egg Whites:
In a separate bowl, whisk the egg whites until stiff peaks form. Gently fold the egg whites into the batter with a spatula until fully incorporated.
7. Fill the Tins:
Using a palette knife or butter knife, transfer the batter into the prepared tins, spreading it evenly.
8. Bake:
Place the tins in the center of the preheated oven and bake for 30 minutes, or until the cakes are golden brown and have domed tops.
9. Cool:
Remove the cakes from the tins after 2 minutes and place them on a wire rack to cool completely.
10. Serve:
Dust the cooled cakes with icing sugar and serve as a charming addition to your tea table or dessert spread.
Notes
- Sweetness: If you prefer less sweetness, reduce the sugar to 150 g without compromising the flavor.
- Currants: Soaking the currants will make them juicier, but it’s optional.
- Mixing: Using your hands to mix ensures even distribution of currants and an authentic touch.
- Self-Raising Flour: You may substitute with self-raising flour for a lighter texture.
Nutrition
- Serving Size: 1 cake
- Calories: 220 kcal
- Sugar: 12 g
- Sodium: 5 mg
- Fat: 12 g
- Saturated Fat: 8 g
- Unsaturated Fat: 4 g
- Trans Fat: 0 g
- Carbohydrates: 25 g
- Fiber: 1 g
- Protein: 3 g
- Cholesterol: 55 mg
Leave a Comment