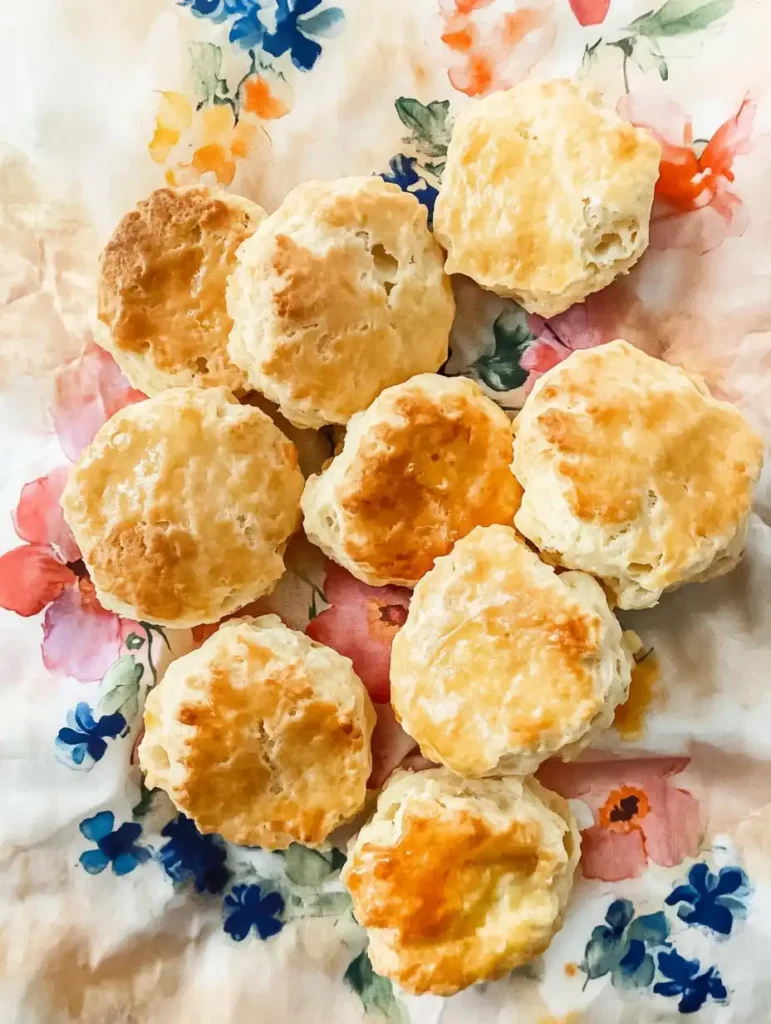
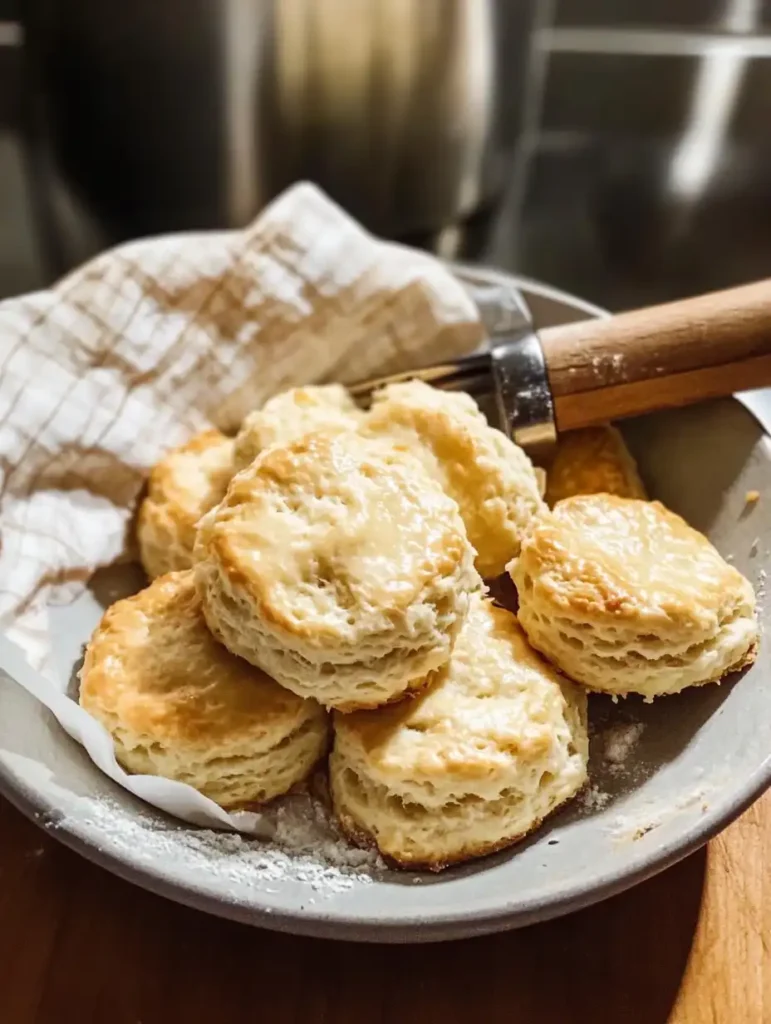
When it comes to comfort food, few things can rival the warm, buttery goodness of homemade buttermilk biscuits. Whether you’re pairing them with a hearty stew, slathering them with jam, or enjoying them with a drizzle of honey butter, buttermilk biscuits are a timeless classic that never fails to satisfy.
The best part? You don’t need to be a professional baker to whip up a batch of these fluffy, flaky delights. With just six simple ingredients and 35 minutes of your time, you’ll have a tray of golden biscuits ready to steal the spotlight at any meal.
In this article, we’ll walk you through a foolproof recipe for buttermilk biscuits, share tips for achieving perfect layers, and answer some frequently asked questions to ensure your biscuits turn out just right every time.
The Secret to Perfect Buttermilk Biscuits
The magic of buttermilk biscuits lies in their tender, flaky texture and rich buttery flavor. But what makes these biscuits truly irresistible is the honey butter topping that adds a touch of sweetness and a golden sheen. The key to success is working with cold ingredients and handling the dough as gently as possible. Overmixing or using warm ingredients can result in dense biscuits instead of the light, airy layers we’re aiming for.
Ingredients You’ll Need
Here’s what you’ll need to make these heavenly buttermilk biscuits:
For the Biscuits:
- 2 ½ cups all-purpose flour
- 2 tablespoons aluminum-free baking powder (not baking soda)
- 1 teaspoon salt
- 2 teaspoons honey
- ½ cup very cold butter (1 stick)
- 1 cup + 3 tablespoons cold buttermilk
For the Topping:
- 2 tablespoons honey
- 1 tablespoon butter
Step-by-Step Instructions
1. Preheat Your Oven
Set your oven to 425°F (218°C). This high heat ensures the biscuits rise quickly and develop a golden crust.
2. Combine Dry Ingredients
In a large mixing bowl, whisk together the flour, baking powder, and salt until well combined.
3. Cut in the Butter
Cut your cold butter into small cubes and add them to the dry mixture. Using a pastry cutter or the back of a fork, work the butter into the flour until it resembles coarse crumbs. This step is crucial for creating those signature flaky layers.
4. Add Wet Ingredients
Make a well in the center of the dry mixture and pour in the cold buttermilk and honey. Use a silicone spatula to gently mix until just combined. The dough will be crumbly—this is normal! Avoid overmixing, as it can make your biscuits tough.
5. Fold for Flaky Layers
Transfer the dough to a floured surface and shape it into a rectangle about 9 inches long. Fold one side of the rectangle into the center, then fold the other side over it (like folding a letter). Rotate the dough 90 degrees and repeat this process two more times. This folding technique creates those beautiful flaky layers.
6. Shape and Cut
Gently flatten the dough into a rectangle about 10 x 7 inches and 1 inch thick. Use a 3-inch cookie cutter to cut out 6 biscuits. Be sure not to twist the cutter, as this can seal the edges and prevent proper rising. Gather any scraps, reshape the dough, and cut out 2 more biscuits for a total of 8.
7. Arrange and Bake
Place the biscuits in a buttered 10-inch cast iron skillet or on a parchment-lined baking sheet so they’re almost touching. This close arrangement helps them rise higher as they bake. Bake for 15 minutes or until the tops are golden brown.
8. Add Honey Butter Topping
While the biscuits are still warm, melt the butter and mix it with honey. Brush this sweet glaze over the tops of the biscuits for an extra layer of flavor and shine. If you’d like more browning on top, return the biscuits to the oven for up to 5 minutes at 450°F (232°C).
Tips for Biscuit Success

Tips for Biscuit Success
- Use Aluminum-Free Baking Powder: This helps avoid any chemical aftertaste that some people may notice with regular baking powder.
- Keep Ingredients Cold: Cold butter and buttermilk are essential for creating steam during baking, which leads to fluffy layers.
- Don’t Overmix: Overworking the dough can result in dense biscuits. Mix just until combined for best results.
- Measure Flour Correctly: Spoon flour into your measuring cup and level it off with a knife for accuracy, or weigh it (2 ½ cups = 300 grams).
- Avoid Twisting the Cutter: Twisting seals the edges of the dough, which can hinder proper rising.
FAQs About Buttermilk Biscuits
1. Can I Make These Biscuits Ahead of Time?
Yes! You can prepare the dough and cut out the biscuits up to two days in advance. Store them in the refrigerator until you’re ready to bake. Alternatively, you can flash-freeze unbaked biscuits on a baking sheet for two hours, then transfer them to a freezer bag for up to three months. When ready to bake, let them thaw in the fridge overnight before popping them in the oven.
2. What Can I Use as a Buttermilk Substitute?
If you don’t have buttermilk on hand, here are some easy substitutes:
- Mix 1 tablespoon of white vinegar or lemon juice with enough milk to make 1 cup; let it sit for 10 minutes until curdled.
- Combine 4 tablespoons of milk with ¾ cup of sour cream or plain yogurt to make 1 cup.
3. How Should I Store Leftover Biscuits?
Store leftover biscuits in an airtight container in the refrigerator for up to five days. Refrigerated biscuits retain more moisture than those stored at room temperature, making them taste better when reheated.
4. How Do I Reheat Biscuits?
To reheat biscuits, wrap them in foil and warm them in a 350°F oven for about 10 minutes, or microwave them for 15–20 seconds.
5. Can I Use Unsalted Butter?
Absolutely! If using unsalted butter, you may want to increase the salt in the recipe slightly to balance out the flavors.
Final Thoughts
Homemade buttermilk biscuits are a simple yet satisfying addition to any meal. With their fluffy layers, buttery flavor, and irresistible honey glaze, they’re sure to become a family favorite in no time. Whether you’re serving them fresh out of the oven or reheating leftovers for breakfast, these biscuits are guaranteed to bring comfort and joy with every bite.
So roll up your sleeves, preheat that oven, and get ready to bake your way to biscuit perfection!
PrintButtermilk Biscuits Recipe
These homemade buttermilk biscuits have fluffy, flaky layers and a sweet honey butter topping. They take just 35 minutes to make with just 6 ingredients!
- Prep Time: 20 minutes
- Cook Time: 15 minutes
- Total Time: 35 minutes
- Yield: 8 biscuits
- Category: Breakfast, Side Dish
- Method: Baking
- Cuisine: American
- Diet: Vegetarian
Ingredients
- 2 ½ cups all-purpose flour
- 2 tablespoons aluminum-free baking powder (not baking soda)
- 1 teaspoon salt
- 2 teaspoons honey
- ½ cup very cold butter (equal to 1 stick)
- 1 cup + 3 tablespoons cold buttermilk
Topping:
- 2 tablespoons honey
- 1 tablespoon butter
Instructions
- Preheat oven to 425°F.
- Add the flour, baking powder, and salt to a large mixing bowl. Stir until well combined.
- Cut the cold butter into cubes and add it to the bowl. Use a pastry cutter (or the back of a fork) to work it in until coarse crumbs form.
- Create a hole in the middle of the dry mixture and add the cold buttermilk and honey. Use a silicone spatula to gently stir until just combined. Don’t overmix. It will be crumbly.
- Add the dough to a floured surface and create a rectangle with your hands about 9 inches long.
- Fold the left side into the middle, then the right side. Rotate the dough so that it’s horizontal. Gently flatten into a rectangle again, and repeat the same folding process 2 more times.
- Form into a 10 x 7-inch rectangle about 1 inch thick.
- Use a 3-inch cookie cutter to cut 6 circles. Do not twist the cutter, as it will seal the edges and prevent airflow, which will hinder them from rising. Lightly flour the inside of the cutter in between. Store cut biscuits in the fridge as you work to prevent them from getting too warm.
- Roll the dough back out until it’s 1 inch thick again and cut 2 more biscuits. You should end up with about 8 biscuits total.
- Butter a 10-inch cast iron skillet and place the biscuits inside so that they are almost touching. The close proximity makes them rise better. Alternatively, place them close together on parchment paper on a baking sheet.
- Bake for 15 minutes or until the tops are golden brown.
- Combine the honey and melted butter and brush the warm biscuits with it. For more browning on top, bake for up to 5 more minutes at 450°F.
- Store in an airtight container or in the refrigerator for up to 5 days. You can also freeze leftover biscuits.
Notes
- Ensure the baking powder is labeled “aluminum-free” to avoid a chemical aftertaste.
- 1 tablespoon baking powder + ½ teaspoon baking soda may also be used.
- To properly measure the flour, use a spoon to scoop it into the measuring cup and level it off with a knife. Alternatively, weigh the flour (2 ½ cups = 300 grams).
- Salt: Non-iodized salt is best for baking. I use Redmond Real Salt.
- Butter: Salted butter works well, but unsalted can also be used. Frozen butter can be shredded and incorporated into the dough.
- If you don’t have honey, use an equal amount of sugar in the biscuits and brush the tops with just butter.
- Don’t overmix the dough to keep the biscuits flaky and soft.
Buttermilk Substitutes (Yields 1 cup):
- 4 tablespoons milk + ¾ cup sour cream.
- 2 tablespoons milk + enough plain yogurt to make a cup.
- 1 tablespoon white vinegar + enough milk to make a cup (let sit for 5–10 minutes).
- 1 tablespoon lemon juice + enough milk to make a cup (let sit for 10 minutes).
Make-Ahead Method:
- Method #1: Prepare the dough and cut the biscuits. Refrigerate for up to 2 days before baking. Alternatively, prepare the dough, complete the folding steps, cover with plastic wrap, and cut the biscuits prior to baking.
- Method #2: Make dough, cut biscuits, and flash freeze on a baking sheet for 2 hours. Store in a freezer bag for up to 3 months. Let them defrost in the fridge overnight, then bake as outlined.
Storage:
- Store in an airtight container and refrigerate for up to 5 days.
- Refrigerated biscuits retain more moisture and taste better when reheated compared to room-temperature storage.
Nutrition
- Serving Size: 1 biscuit
- Calories: 299
- Sugar: 7 g
- Sodium: 440 mg
- Fat: 14 g
- Saturated Fat: 9 g
- Unsaturated Fat: Not Specified
- Trans Fat: 1 g
- Carbohydrates: 38 g
- Fiber: 1 g
- Protein: 5 g
- Cholesterol: 38 mg


Leave a Comment