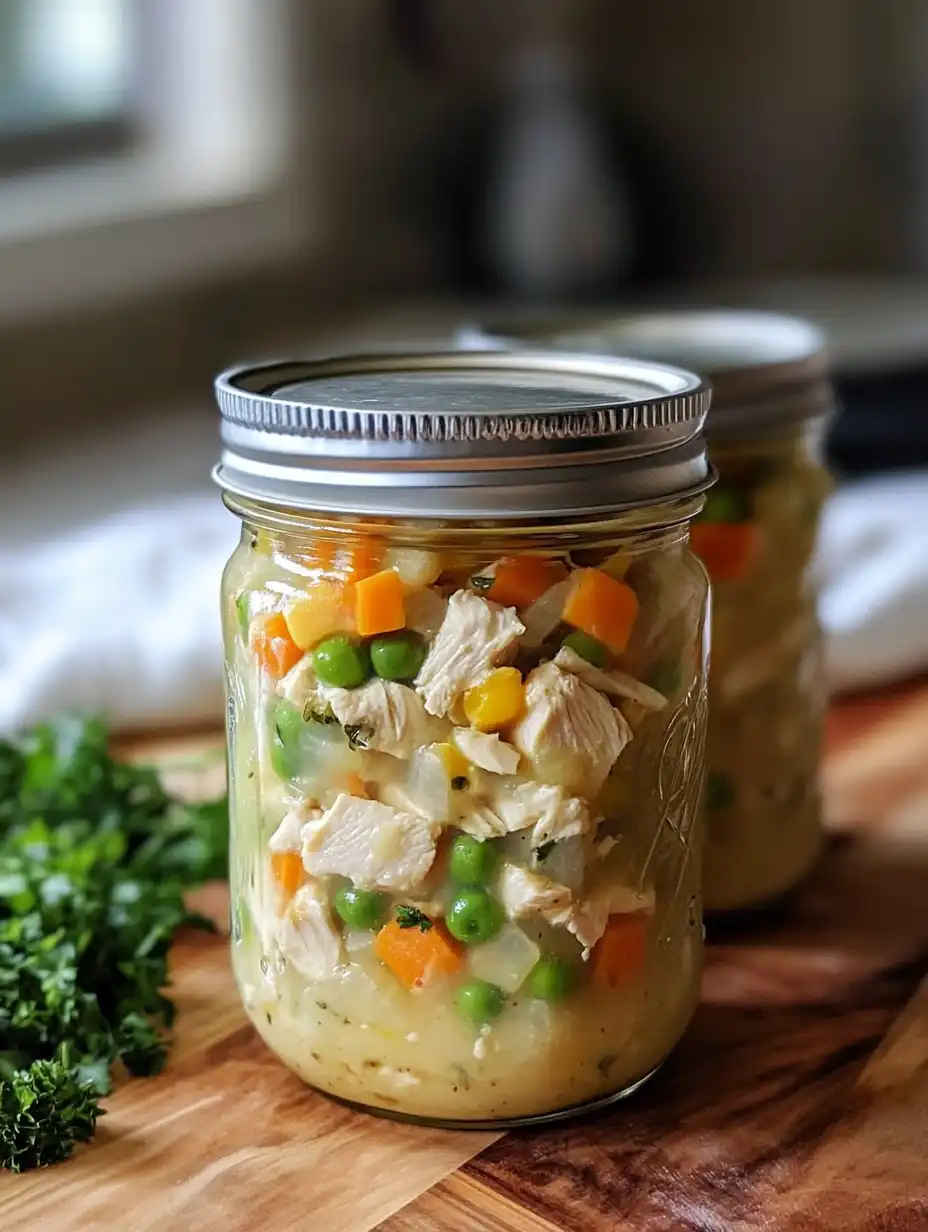
If you’re a fan of hearty, comforting chicken pot pie and love the idea of having ready-made meals stocked on your pantry shelf, this Chicken Pot Pie Filling Canning Recipe is about to become your new favorite! Imagine having jars of rich, flavorful chicken pot pie filling ready to go for quick and easy dinners—perfect for busy weeknights or when you’re craving a homemade meal without the hassle.

This recipe is a game-changer for meal prep enthusiasts and home canning lovers. It’s adapted from the trusted Ball Book of Preserving, with a few tweaks like skipping the mushrooms and opting for a raw pack method instead of hot packing. The result? Seven quart jars of delicious, shelf-stable chicken pot pie filling that can last up to two years!
Whether you’re pairing it with buttery sourdough rolls, flaky cheddar biscuits, or using it as a base for soups and Shepherd’s pies, this recipe is versatile, satisfying, and oh-so-easy to make.
Why You’ll Love This Recipe
- Convenience in a Jar: With seven jars of chicken pot pie filling on your shelf, dinner is always just minutes away.
- Versatility: Use it for classic chicken pot pie, hearty soups, casseroles, or even creative recipes like pot pie-stuffed baked potatoes.
- Shelf-Stable: Pressure canning ensures your jars are safe to store for up to two years.
- Simple Ingredients: Made with wholesome ingredients you likely already have in your kitchen.
Ingredients for Chicken Pot Pie Filling
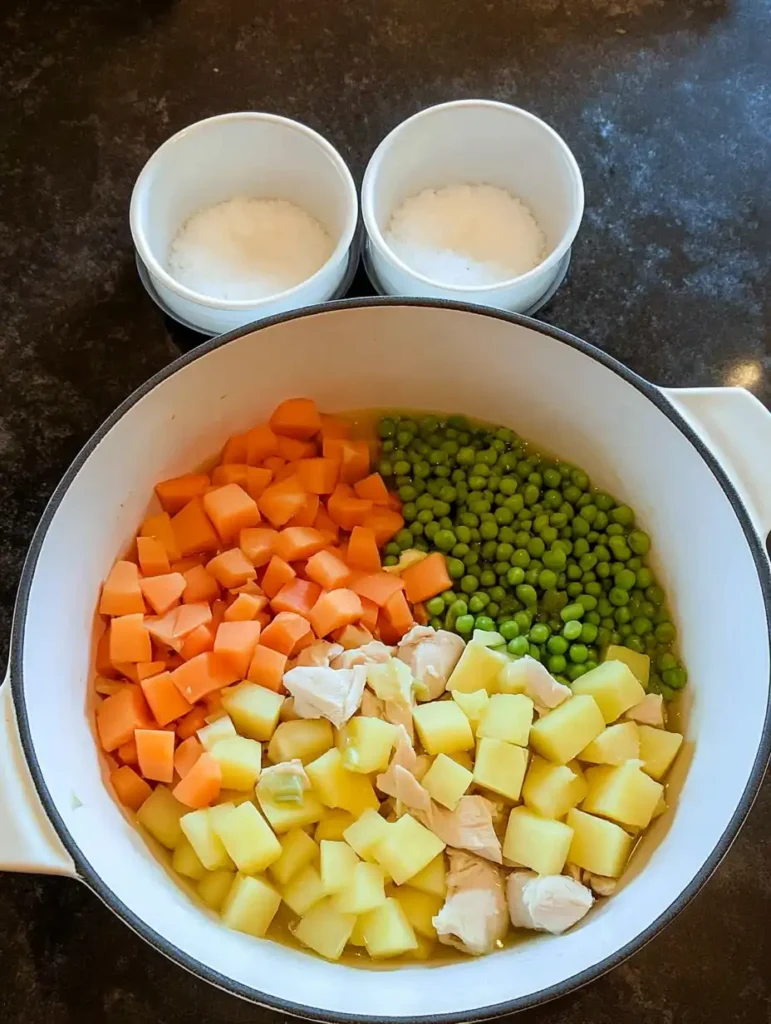
Canned Chicken Pot Pie Filling | Jarred Dinner Recipe
Here’s what you’ll need to create this delicious dinner in a jar:
- Boneless Skinless Cooked Chicken: 7–8 cups (rotisserie chicken works great!)
- Red or Yukon Gold Potatoes: 7 cups, peeled and chopped
- Carrots: 5 cups, peeled and chopped
- Celery: 3½ cups, chopped
- Onion: 3½ cups, diced
- Frozen Peas: 3½ cups
- Salt: 1 teaspoon per jar
- Thyme: ¼ teaspoon per jar (optional)
- Broth or Water: 3 quarts (bone broth adds richness, while clear broth or water keeps it light)
Step-by-Step Instructions
1. Prep Your Pressure Canner
Before beginning, ensure your pressure canner is in good working condition. Check the rubber seal ring, vents, and the metal plate at the bottom. Fill the canner with the appropriate amount of water (e.g., 3 quarts for a Presto pressure canner).
2. Prepare Your Jars
Wash seven quart jars thoroughly and inspect them for any cracks. Use new lids and clean rings to ensure proper sealing.
3. Chop and Prep Ingredients
- Peel and cube the potatoes into ½-inch to 1-inch pieces.
- Dice the onions and celery.
- Peel and chop the carrots.
4. Fill the Jars
- Add 1 teaspoon of salt and ¼ teaspoon of dried thyme to each jar.
- Evenly distribute the ingredients among the jars:
- 1 cup of cooked chicken per jar
- 1 cup of potatoes per jar
- ½ cup each of carrots, celery, onion, and frozen peas per jar
- Pour broth or water into each jar, leaving 1 inch of headspace at the top to allow for expansion during processing.
5. Remove Air Bubbles
Use a plastic utensil or butter knife to gently release any trapped air bubbles in the jars. Wipe the rims clean with a vinegar-dampened cloth to remove residue that could prevent sealing.
6. Seal the Jars
Place clean lids on each jar and screw on the rings until they are finger-tight (don’t overtighten).
Pressure Canning Instructions
1. Load the Canner
Place the filled jars into your prepared pressure canner. Secure the lid and lock it into position.
2. Vent Steam
Turn the heat to medium-high and allow steam to vent through the vent pipe for 10 minutes before adding your weight (adjust weight based on your elevation).
3. Process at Pressure
Once your canner reaches pressure (indicated by the weight jiggling), set your timer for 90 minutes. Maintain consistent pressure throughout the process.
4. Cool Down Naturally
After processing for 90 minutes, turn off the heat and allow the pressure canner to cool naturally. Do not rush this step—wait until the pressure indicator drops on its own before removing the weight and opening the lid.
5. Remove Jars Carefully
Let the jars sit in the canner for an additional 10 minutes before transferring them to a towel-lined counter. Avoid tipping or moving them while they cool.
6. Check Seals and Store
After 24 hours, remove the rings and check that all lids have sealed properly. Store your jars in a cool, dark place for up to two years!
Tips for Success
- Elevation Matters: Adjust your pressure weight based on your altitude to ensure safe processing.
- Use High-Quality Broth: Bone broth adds depth of flavor, but clear broth works well if you prefer a lighter filling.
- Don’t Skip Vinegar Wipes: Cleaning jar rims with vinegar ensures a proper seal every time.
- Label Your Jars: Include the date so you can keep track of shelf life.
FAQs
Can I Add Other Vegetables?
Yes! While this recipe is tested with these specific ingredients for safety, you can experiment with similar low-acid veggies like corn or green beans (just be sure to maintain proper headspace).
Do I Have to Use a Pressure Canner?
Absolutely! Because this recipe includes low-acid ingredients like chicken and vegetables, pressure canning is essential to prevent botulism and ensure safety. Water bath canning is not safe for this recipe.
How Long Does It Last on the Shelf?
When properly canned and stored in a cool, dark place, these jars can last up to two years without compromising quality or safety.
Can I Use Raw Chicken Instead of Cooked?
This recipe is designed for cooked chicken to ensure even distribution in the jars and proper processing times. Using raw chicken may alter safety guidelines and is not recommended without additional testing.
Stocking your pantry with these jars of Chicken Pot Pie Filling means you’re always just minutes away from a warm, comforting meal that tastes like it took hours to prepare. Whether you’re serving it as a classic pot pie or getting creative with other dishes, this Dinner in a Jar recipe is sure to become a staple in your home! Happy canning!
Are there how to use it instructions? like does it need to be cooked for a certain amount of time before being eatten?