Are you ready to elevate your bread-making game with minimal effort? Say hello to the easiest, tastiest focaccia recipe you’ll ever try! This no-knead focaccia is perfect for anyone who wants to enjoy homemade bread without the hassle of kneading or mastering complicated techniques.
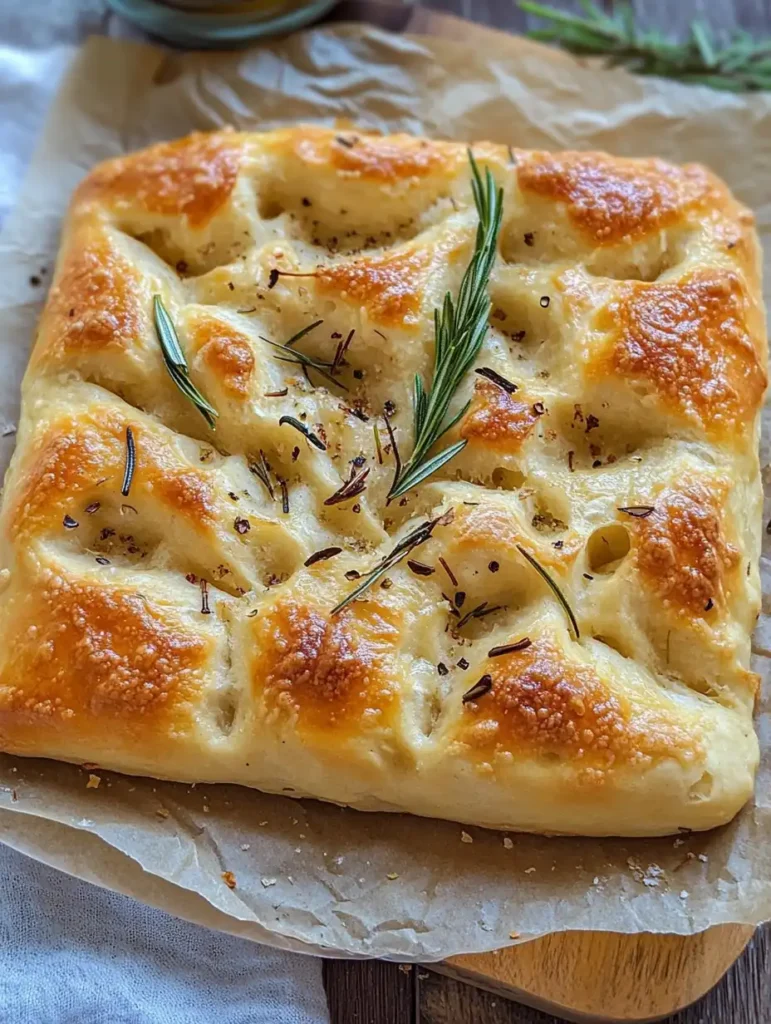
With its soft crumbs, crisp golden crust, and aromatic rosemary topping, this Italian classic is a showstopper that’s surprisingly simple to make.
Whether you’re hosting a dinner party, looking for a quick snack, or just want to treat yourself to something special, this foolproof recipe will become your go-to for delicious homemade bread. Let’s dive in!
Why You’ll Love This No-Knead Focaccia
- Zero Effort: Forget kneading, rolling, or fancy equipment—this recipe requires nothing more than mixing and waiting.
- Incredible Texture: The long resting time creates soft, airy crumbs and a perfectly crispy crust.
- Customizable: Add your favorite toppings like olives, garlic, or sun-dried tomatoes to make it your own.
- Beginner-Friendly: Even if you’ve never baked bread before, this recipe is practically fail-proof!
Ingredients You’ll Need
Here’s what you’ll need to whip up this delightful focaccia:
- 4 cups all-purpose flour
- 2 tsp yeast
- 1 tsp salt
- 2 tsp sugar
- 2 cups lukewarm water
- 4 tbsp olive oil
- Sea salt and rosemary (optional, for sprinkling on top)
Step-by-Step Instructions
1. Mix the Dough
Start by combining the flour, yeast, salt, and sugar in a large mixing bowl. Pour the lukewarm water over the dry ingredients and mix everything together with a spatula until a sticky dough forms.
Next, drizzle a teaspoon or two of olive oil over the surface of the dough and rub it gently to coat. This will keep the dough moist and prevent it from drying out during refrigeration. Cover the bowl tightly with plastic wrap and refrigerate for 18–24 hours. (Pro tip: The longer it rests, the better the flavor!)
2. Prepare Your Pan
When you’re ready to bake, grease a 9” x 13” or 10” x 12” pan with olive oil and line the bottom with parchment paper if desired. Even non-stick pans benefit from this extra step to ensure easy removal of the bread later.
3. Fold and Shape the Dough
Take the dough out of the refrigerator and oil your hands to prevent sticking. Gently pull the edges of the dough inward, folding it over itself in the bowl. Turn the bowl a quarter turn and repeat this folding process four times in total. Do this step twice to strengthen the structure of your dough without kneading!
4. Second Rise
Pour 2 tablespoons of olive oil into the center of your prepared pan and transfer the dough onto it. Roll the dough gently to coat it evenly in oil. Cover with plastic wrap or a kitchen towel and let it rise in a draft-free spot for 2–4 hours, or until it doubles in size and spreads across the pan.
5. Add Toppings
Preheat your oven to 220°C (430°F). Once the dough has risen beautifully, sprinkle rosemary (if using) all over its surface. Pour the remaining 2 tablespoons of olive oil across the top and spread it evenly with your fingers. Use your fingertips to create dimples in the dough—this signature step is what gives focaccia its unique look! Finally, sprinkle sea salt over the top for that irresistible savory crunch.
6. Bake to Perfection
Place your pan in the preheated oven and bake for 25–30 minutes, or until the top turns golden brown and the bottom is crisp. The smell of freshly baked bread will fill your kitchen—it’s pure magic!
7. Cool and Serve
Let the focaccia rest in the pan for about 5 minutes before transferring it to a cooling rack. Slice warm for maximum enjoyment or let it cool completely before serving. Pair it with soups, salads, or enjoy it as a standalone snack—it’s delicious either way!
Tips for Success
- Use Fresh Yeast: For best results, make sure your yeast is fresh and active. Expired yeast can lead to disappointing results.
- Don’t Skip the Resting Time: The long refrigeration period is key to achieving that soft texture and rich flavor. Plan ahead!
- Customize Your Toppings: Not a fan of rosemary? Try garlic, cherry tomatoes, olives, or parmesan cheese instead!
- Check Oven Temperature: Every oven is different, so keep an eye on your focaccia as it bakes to avoid overcooking.
Nutrition Information
Here’s what you’ll get per serving (based on 10 servings):
- Calories: 239 kcal
- Carbohydrates: 40g
- Protein: 5g
- Fat: 6g (with healthy monounsaturated fats from olive oil!)
- Fiber: 2g
This recipe strikes a balance between indulgence and wholesome ingredients—perfect for any occasion!
Final Thoughts
Making bread doesn’t have to be intimidating or time-consuming, and this no-knead focaccia proves it! With just a handful of ingredients and some patience, you can create bakery-quality bread right in your own kitchen. The soft crumbs, crispy crust, and aromatic rosemary make it an irresistible treat that will have everyone asking for seconds (or thirds!).
So what are you waiting for? Grab your mixing bowl, roll up your sleeves, and get ready to impress yourself—and everyone else—with this super easy no-knead focaccia recipe!
Let us know how yours turns out in the comments below—happy baking!
PrintSuper Easy No-Knead Focaccia

No-knead focaccia is a super-easy snack idea made with zero effort and no technique (not even kneading). With the softest crumbs, fantastic texture, and delicious flavor, it’s the easy focaccia recipe you didn’t know you were looking for.
- Prep Time: 15 minutes
- Cook Time: 30 minutes
- Total Time: 1 day 45 minutes
- Yield: 10 servings
- Category: Bread, Side Dish, Snack
- Method: Baking
- Cuisine: Italian
- Diet: Vegetarian
Ingredients
- 4 cups all-purpose flour
- 2 teaspoons yeast
- 1 teaspoon salt
- 2 teaspoons sugar
- 2 cups lukewarm water
- 4 tablespoons olive oil, divided
- Sea salt, for sprinkling
- Fresh rosemary (optional), for sprinkling
Instructions
Combine the flour, yeast, salt, and sugar in a large bowl.
Pour over the lukewarm water. Mix well with a spatula until a sticky dough is formed.
Pour a teaspoon or two of olive oil on the surface of the dough and rub it all over.
Cover with plastic wrap and refrigerate for 18–24 hours. I kept it for 24 hours.
When you’re ready to bake, grease a 9″x13″ or 10″x12″ pan. Line the bottom with parchment paper. You may not need to do that if your pan is non-stick.
I used a 10″x12″ pan and lined it too.
Take out the refrigerated dough. Oil your hands and gently bring the proofed dough in from the sides of the bowl.
Fold the dough over itself. Turn the bowl a quarter of the way and fold the dough over itself again. Do 3 more quarter turns of the bowl with folding over the dough each time.
Repeat this step once more.
Pour 2 tablespoons of olive oil in the center of the prepared pan.
Gently place the deflated dough on the olive oil. Roll it a couple of times to coat it well with oil.
Cover this with plastic wrap or a kitchen towel and keep in a draft-free place for 2–4 hours or until the dough doubles and covers the pan.
Mine doubled in 1.5 hours.
Preheat the oven to 220 C.
Sprinkle rosemary (if using) all over the surface of the dough.
Pour over the remaining 2 tablespoons of olive oil on the dough and spread it all over. Dimple the dough using your fingers. Sprinkle the sea salt.
Bake the bread at 220 C for 25–30 minutes, until the top is golden brown. The bottom of the bread should be crispy.
Let the bread rest in the pan for 5 minutes before turning it out on a cooling rack. Slice warm or let it cool completely. Enjoy!
Notes
No kneading or stand mixer required—just mix, fold, and let it rest.
The longer the dough rests (up to 24 hours), the better the flavor and texture.
Great as a snack, sandwich base, or side for soups and salads.
Nutrition
- Serving Size: 1 serving
- Calories: 239 kcal
- Sugar: 1 g
- Sodium: 1 mg
- Fat: 6 g
- Saturated Fat: 1 g
- Unsaturated Fat: 5 g
- Trans Fat: 0 g
- Carbohydrates: 40 g
- Fiber: 2 g
- Protein: 5 g
- Cholesterol: 0 mg


Can you use pizza dough