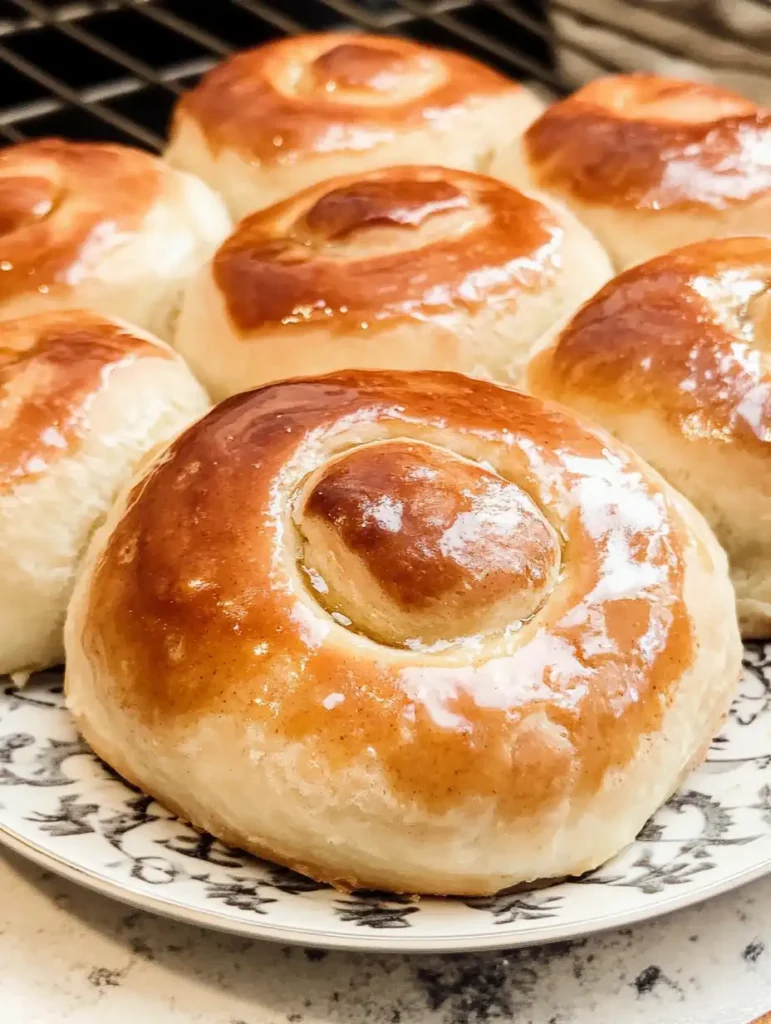
There’s something magical about the soft, sticky sweetness of a honey bun. Whether enjoyed as a breakfast indulgence or a midday snack, these delightful pastries have a way of making any moment feel special.
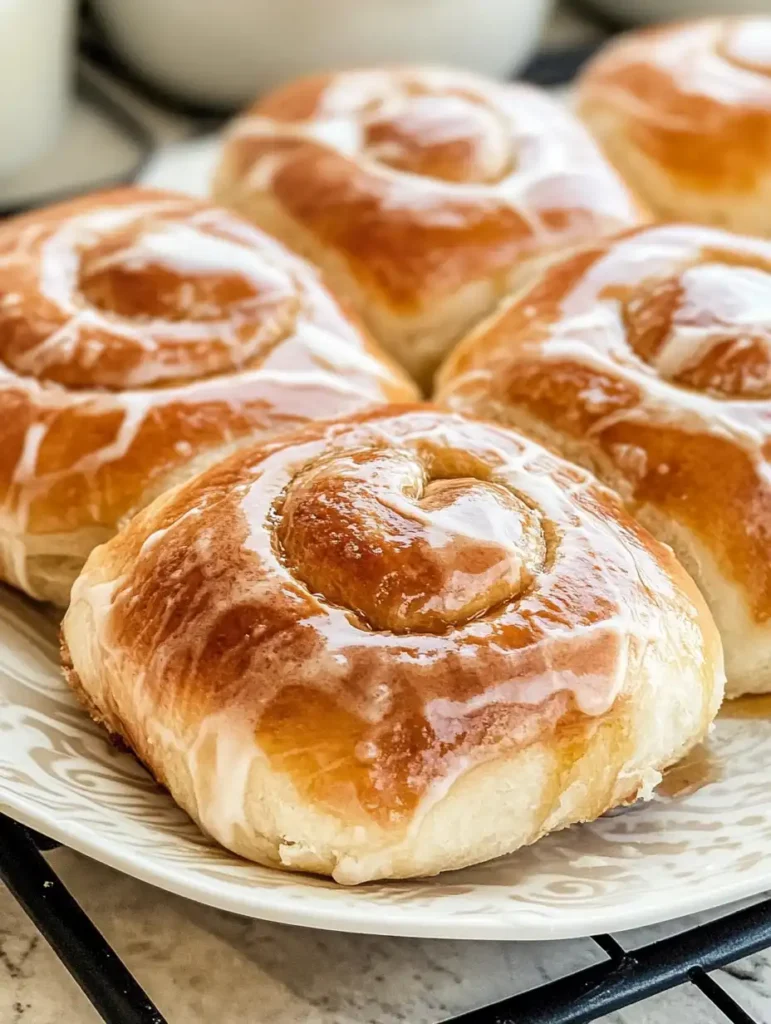
While store-bought honey buns are convenient and tasty, nothing beats the flavor and satisfaction of making your own from scratch. These Homemade Honey Buns are everything you love about the classic treat—soft, sweet, and melt-in-your-mouth delicious—with the added bonus of a creamy homemade glaze.
Ready to bring the bakery to your kitchen? Let’s dive into how you can create these irresistible honey buns at home!
Why Make Homemade Honey Buns?
Sure, you could grab a pack of honey buns at the store, but making them yourself allows for complete control over the ingredients and flavors. Plus, there’s something deeply rewarding about creating these golden-brown beauties from scratch. Homemade honey buns have a richer, fresher taste, and you can customize them to your liking—add a little extra cinnamon, tweak the sweetness of the glaze, or even experiment with fillings.
Not to mention, these honey buns are perfect for impressing family and friends. Serve them warm with coffee or tea, and watch everyone’s faces light up with joy.
What You’ll Need to Make Homemade Honey Buns
Here’s a quick overview of the key ingredients that come together to create these delectable treats:
For the Dough:
- Warm Water: Activates the yeast for that perfectly risen dough.
- Granulated Sugar & Honey: Adds sweetness and helps achieve a golden-brown finish.
- Active Yeast: The magic ingredient that gives the buns their fluffy texture.
- All-Purpose Flour: The foundation of the dough.
- Shortening: Melted shortening ensures a soft, bakery-style texture (but butter works too!).
- Egg Yolks: Adds richness to the dough.
- Vanilla Extract & Salt: Enhances flavor.
For the Cinnamon Sugar Filling:
- A simple mix of granulated sugar and cinnamon creates that signature swirl of sweetness.
For the Glaze:
- Powdered Sugar, Honey, Butter, Vanilla Extract, and Salt: Combine to make a creamy, sweet glaze that coats the buns beautifully.
Step-by-Step Instructions
Making homemade honey buns may take some time, but the process is straightforward and well worth the effort. Here’s how to do it:
1. Prepare the Dough
Start by activating your yeast. In the bowl of a stand mixer, whisk together warm water, sugar, and yeast until combined. Let it sit for about 5 minutes until frothy—this means your yeast is alive and ready to work its magic.

Next, switch to a dough hook attachment and add in the remaining sugar, flour, honey, melted shortening, egg yolks, vanilla extract, and salt. Knead the dough on medium speed for about 8 minutes. The dough will be sticky but should stretch without tearing when ready.
Transfer the dough to a lightly greased bowl, cover with plastic wrap or a clean kitchen towel, and let it rise for 1 hour or until doubled in size.
2. Make the Cinnamon Sugar Filling
While your dough is rising, whisk together granulated sugar and cinnamon in a small bowl. This simple mixture will add that classic honey bun flavor when rolled into the dough.
3. Roll and Shape the Dough
Once your dough has risen, turn it out onto a lightly floured surface. Roll it out into a rectangle about 12 inches long and 8 inches wide. Sprinkle the cinnamon sugar mixture evenly over the dough and gently press it in.
Roll the dough tightly from the long side to form a log shape. Turn it diagonally and score it into 8 equal pieces (about 1 inch each). Trim off the ends for even shapes if needed. Place each piece onto a parchment-lined baking sheet with enough space between them to rise again. Use your fingers to lightly press and shape each piece into an oblong form. Let them rise for another 45 minutes until puffy but not doubled in size.
4. Fry the Honey Buns
Heat vegetable oil in a large pan or stockpot over medium heat until it reaches 365°F. Carefully place a few honey buns into the hot oil, being mindful not to overcrowd the pan. Fry each bun for about 90 seconds on one side before flipping and frying for another 90 seconds on the other side.
Once fried to golden perfection, transfer the buns to a wire cooling rack placed over a paper towel-lined baking sheet to drain excess oil. Gently press down on each bun to flatten slightly before glazing.
5. Make and Apply the Glaze
While your buns are frying, whisk together powdered sugar, honey, melted butter, vanilla extract, salt, and warm water until smooth and creamy. Dip each freshly fried bun into the glaze while still warm to ensure they soak up all that sweet goodness. Once set, this glaze will add a delightful crisp texture to your honey buns.
Tips for Perfect Honey Buns
- Yeast Activation: Use water that’s between 105°F and 110°F—too hot will kill the yeast, while too cold won’t activate it properly.
- Flattening is Key: Pressing down on the buns at various stages helps achieve that dense yet tender texture we all love in honey buns.
- Storage: Store leftover honey buns in an airtight container for up to 5 days or freeze them for up to 3 months. Warm them in the microwave for 5–10 seconds before serving for that fresh-baked feel.
- Best Flavor: Believe it or not, these honey buns taste even better after sitting in an airtight container for a day or two! This allows their flavors to meld and their texture to soften perfectly—just like store-bought buns but better!
Why You’ll Love These Homemade Honey Buns
These homemade honey buns are everything you could want in a sweet treat: soft yet dense, sticky yet satisfying, and bursting with cinnamon-sugar flavor in every bite. The homemade glaze adds an irresistible finishing touch that makes these buns truly special.
Whether you’re whipping them up for breakfast, brunch, or dessert—or just because—you’ll find yourself coming back to this recipe again and again.
So what are you waiting for? Grab your apron and get ready to experience the joy of homemade honey buns! You’ll never look at store-bought ones the same way again.
Happy baking! Let us know how your honey buns turn out in the comments below!
PrintHomemade Honey Buns
These soft, sweet Homemade Honey Buns have the same melt-in-your-mouth texture that you love from store-bought honey buns! Sticky and sweet with a cinnamon sugar filling, and a creamy homemade glaze.
- Prep Time: 1 hour
- Cook Time: 15 minutes
- Total Time: 3 hours 15 minutes
- Yield: 8 servings
- Category: Breakfast Ideas
- Method: Frying
- Cuisine: American
- Diet: Not specified
Ingredients
For the Dough:
- ½ cup warm water
- 3 tablespoons granulated sugar
- 1 tablespoon active yeast
- 2 ⅔ cups all-purpose flour
- ⅓ cup honey
- ¼ cup shortening, melted
- 3 large egg yolks
- 1 teaspoon vanilla extract
- ½ teaspoon salt
- Vegetable oil, for frying
For the Cinnamon Sugar:
- ¼ cup granulated sugar
- 1 ½ teaspoons cinnamon
For the Glaze:
- 4 ⅔ cups powdered sugar
- 2 ½ tablespoons honey
- 1 tablespoon melted butter
- ½ teaspoon vanilla extract
- ¼ teaspoon salt
- Warm water, as needed
Instructions
- In the bowl of a stand mixer fitted with a whisk attachment, combine water, 2 teaspoons of sugar, and yeast. Whisk together until just combined, then let sit for 5 minutes until frothy.
- Swap the attachment to a dough hook, then add in the remaining sugar, flour, honey, shortening, egg yolks, vanilla, and salt. Knead on medium speed for 8 minutes. The dough will be sticky but should stretch and be transparent.
- Transfer the dough to a clean, lightly greased bowl. Cover with plastic wrap or a clean kitchen towel. Let rise for 1 hour, until doubled in size.
- While the dough is rising, make the cinnamon sugar by whisking the cinnamon and sugar together in a small bowl.
- Once the dough has risen, turn it out onto a lightly floured surface. Roll the dough to 12” long and 8” wide. Dust with the cinnamon sugar mixture and gently press it into the dough.
- Roll the dough up from the long side, then turn the roll diagonally. Use a knife to score 8 equal pieces (about 1” each). Trim the ends and cut the scored sections.
- Place each piece onto a parchment-lined baking sheet with at least 2” of space between them. Shape them slightly with your fingers, then let rise for about 45 minutes until puffy but not doubled.
- Halfway through the rise time, heat oil in a large pan or stockpot over medium heat until it reaches 365°F.
- Once risen, gently press down on each bun, then fry in batches. Cook for 90 seconds per side until golden brown.
- While frying, whisk together the glaze ingredients, adding ⅓ to ½ cup warm water until the desired consistency is reached.
- Remove honey buns from the oil, place on a wire cooling rack over a paper towel-lined baking sheet, and gently press down to flatten. Immediately dip each bun into the glaze.
- Repeat the frying and glazing process with the remaining honey buns.
Notes
- Storage: Store in an airtight container for up to 5 days. Microwave for 5-10 seconds before serving. They can also be frozen for up to 3 months.
- Yeast Tips: Use water at 105°-110°F to properly activate the yeast.
- Shortening Substitute: You can use melted butter instead of shortening.
- Flattening: Pressing down at each stage helps achieve the dense, melt-in-your-mouth texture.
- Best the Next Day: Letting the honey buns sit in an airtight container for a day enhances their softness.
- Milk Substitute: Warm milk can be used instead of warm water in the dough.
Nutrition
- Serving Size: 1 honey bun
- Calories: 422 kcal
- Sugar: 78g
- Sodium: 6g
- Fat: 10g
- Saturated Fat: 4g
- Unsaturated Fat: 6g
- Trans Fat: 0g
- Carbohydrates: 80mg
- Fiber: 194mg
- Protein: 1g
- Cholesterol: 51g


Leave a Comment