There’s something magical about the aroma of fresh bread wafting through your kitchen. It has the power to evoke feelings of warmth, comfort, and nostalgia.

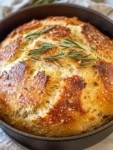
Today, I’m excited to share one of my absolute favorite recipes: Dutch Oven Garlic Rosemary Bread. This recipe is proof that homemade bread doesn’t have to be complicated—it’s simple, flavorful, and perfect for beginners and seasoned bakers alike.
Whether you’re looking for a side dish to complement a hearty soup or stew, a snack to enjoy with coffee, or just a slice of heaven slathered with butter, this bread delivers on all fronts. With hints of fragrant rosemary and savory garlic baked into a golden, crusty loaf, it’s hard to resist. Let’s dive into the recipe!
Why Bake Bread in a Dutch Oven?
If you’ve never tried baking bread in a Dutch oven, you’re in for a treat. The heavy lid traps steam as the bread bakes, creating an environment similar to a professional bread oven. This results in a loaf with a perfectly crisp crust and tender interior. Plus, using a Dutch oven eliminates the need for special equipment like a baking stone or steam injector—making artisan-style bread accessible to everyone.
Ingredients You’ll Need
Here’s what you’ll need to whip up this irresistible bread:
- 3 cups All-Purpose Flour: The foundation of your bread.
- 1 1/2 tsp Sugar: A touch of sweetness to balance the flavors.
- 2 tsp Salt: Essential for flavor enhancement.
- 2 1/2 tsp Quick Yeast (or 1 package): The magic ingredient that helps the dough rise.
- 1 1/3 cups Warm Water: Activates the yeast and brings the dough together.
- 2 Large Rosemary Sprigs, diced: Fresh rosemary adds an earthy, aromatic note.
- 3 Garlic Cloves, diced: For a savory punch that complements the rosemary.
Equipment You’ll Need
Before you begin, make sure you have the following tools on hand:
- A 5.5 or 6-quart Dutch Oven
- Mixing bowls
- A wooden spoon
- Parchment paper
Step-by-Step Instructions
1. First Rise: Mixing the Dough
Start by combining all your ingredients in a mixing bowl. Don’t worry if the dough looks sticky and shaggy—that’s exactly how it should be! Stir everything together with a wooden spoon until fully combined. Cover the bowl with a clean towel and let the dough rise for 60 minutes. If your oven has a proof setting, use it; otherwise, place the bowl near a warm air vent or on top of your stove (with the oven turned on) to create a cozy environment for rising.
2. Shaping the Dough
Once the dough has risen and doubled in size, it’s time to shape it. Lay out a piece of parchment paper and dust it lightly with flour. Transfer the dough onto the paper and begin shaping it into a ball. Stretch each side of the dough and fold it over itself until you achieve a smooth, round shape. Flip the ball over so that the smooth side is facing up. Cover it with a towel and let it rest for another 20 minutes while you prepare your Dutch oven.
3. Heating the Dutch Oven
Preheat your oven to 450°F and place your Dutch oven inside (without the lid) to heat up. This step ensures that your loaf bakes evenly and develops that signature crusty exterior. While your Dutch oven is warming up, your dough will continue its second rise.
4. Baking the Bread
Once your Dutch oven is hot, carefully remove it from the oven using oven mitts and place it on your stovetop. Lift the dough using the parchment paper and transfer it directly into the Dutch oven. Use a sharp knife to score the top of the dough—this allows steam to escape as it bakes. You can keep it simple with a single slash down the center or get creative with designs.
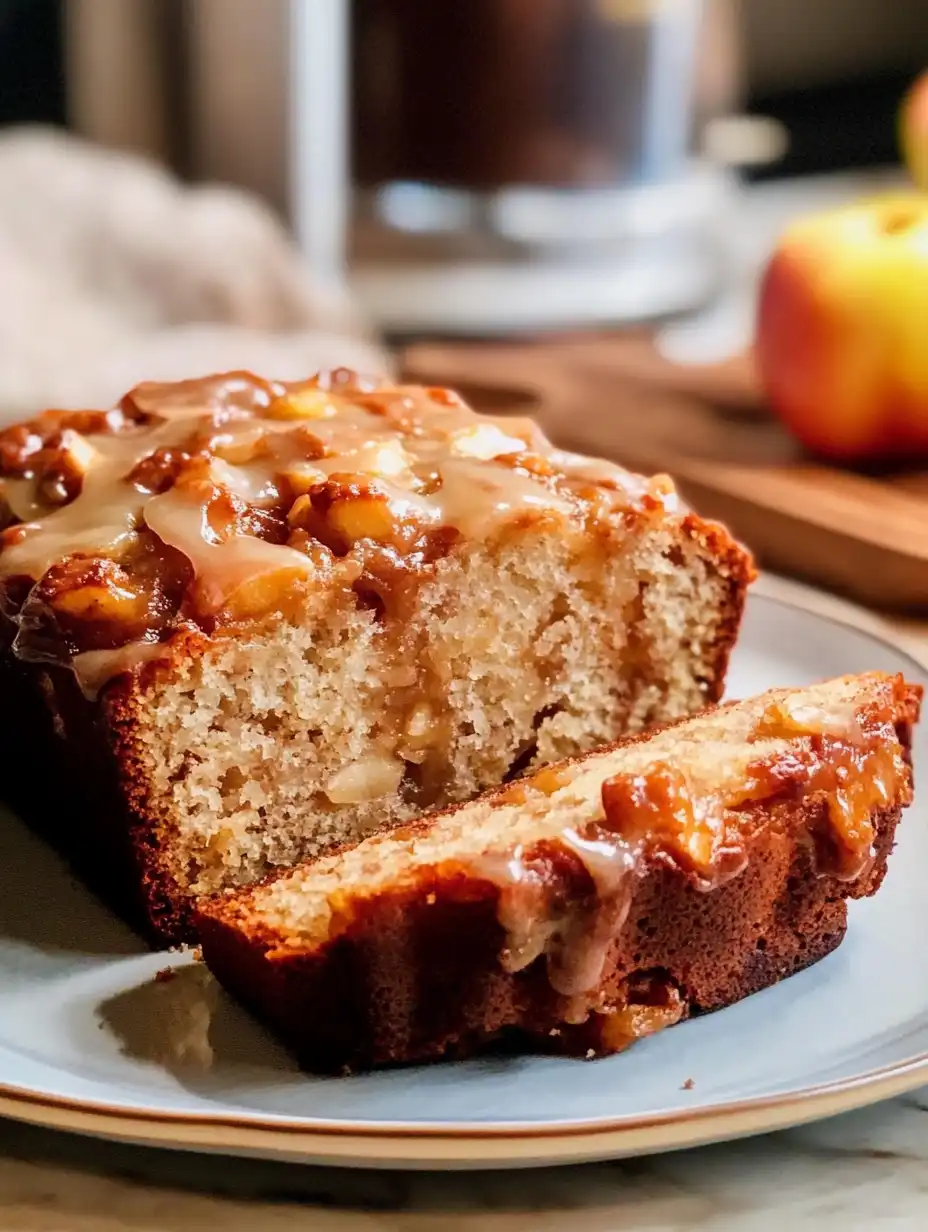
Cover the Dutch oven with its lid and bake for 30 minutes. When you remove it, the bread will look pale but fully cooked. To achieve that golden-brown crust, return the bread to the oven without the lid and bake for an additional 10 minutes or until it reaches your desired level of browning.
5. Cooling and Serving
Once baked to perfection, use the parchment paper to lift the bread out of the Dutch oven and set it on a cooling rack. Resist the temptation to slice into it immediately—let it cool for at least 30 minutes so that the flavors can settle and the texture firms up.
When it’s ready, slice into your loaf and enjoy! Here are some serving ideas:
- Spread butter over warm slices and sprinkle with sea salt.
- Dip chunks into olive oil mixed with balsamic vinegar.
- Or simply savor it plain—it’s that good!
Tips for Success
- Warm Water Temperature: Make sure your water is warm but not hot—around 110°F is ideal. Too hot can kill the yeast; too cold may prevent rising.
- Fresh Ingredients: Use fresh rosemary and garlic for maximum flavor.
- Don’t Skip Scoring: Scoring isn’t just decorative—it’s essential for allowing steam to escape and preventing your loaf from cracking unpredictably.
Nutrition Information
Here’s what you can expect per slice:
- Calories: 187 kcal
- Carbohydrates: 38g
- Protein: 6g
- Fat: 1g
- Sodium: 586mg
- Fiber: 2g
It’s wholesome comfort food that fits perfectly into any meal plan.
Final Thoughts
This Dutch Oven Garlic Rosemary Bread is more than just food—it’s an experience. From mixing the dough to pulling that golden loaf out of the oven, every step is deeply satisfying. The combination of garlic and rosemary creates a flavor profile that’s both rustic and refined, making this bread perfect for any occasion.
So grab your Dutch oven, roll up your sleeves, and treat yourself (and maybe your loved ones) to some homemade comfort today. Trust me—once you make this bread, you’ll find yourself coming back to it again and again!
Happy baking! 🍞
PrintDutch Oven Garlic Rosemary Bread
This dutch oven garlic rosemary bread is incredibly simple and comforting. Homemade bread with fresh rosemary and garlic, baked to golden perfection in a Dutch oven.
- Prep Time: 1 hour 5 minutes
- Cook Time: 40 minutes
- Total Time: 2 hours 15 minutes
- Yield: 8 slices
- Category: Side Dish, Snack
- Method: Baking
- Cuisine: American
- Diet: Vegetarian
Ingredients
3 cups All Purpose Flour
1 1/2 tsp sugar
2 tsps salt
2 1/2 tsp quick yeast (1 package)
1 1/3 cups warm water
2 large rosemary sprigs, diced
3 garlic cloves, diced
Instructions
1. Add all of the ingredients to a mixing bowl and stir together. The dough will be sticky and shaggy.
2. Cover the bowl with a towel and let rise for 60 minutes in a warm place.
3. Lay out a piece of parchment paper, dust it with flour, and transfer the dough. Shape into a ball by folding edges over.
4. Flip smooth side up, cover with a towel, and let rise 20 minutes or while the Dutch oven heats.
5. Place Dutch oven (without lid) in oven and preheat to 450°F.
6. When ready, remove Dutch oven with mitts, transfer dough in parchment, and score the top with a knife.
7. Cover and bake for 30 minutes.
8. Remove lid and bake another 10 minutes until golden brown.
9. Remove from oven and let cool at least 30 minutes before serving.
Notes
Make sure your oven is fully preheated to ensure a good crust.
Score the dough before baking to help steam escape.
Let the bread cool at least 30 minutes before slicing for best texture.
Nutrition
- Serving Size: 1 slice
- Calories: 187kcal
- Sugar: 1g
- Sodium: 586mg
- Fat: 1g
- Saturated Fat: 1g
- Unsaturated Fat: 0g
- Trans Fat: 0g
- Carbohydrates: 38g
- Fiber: 2g
- Protein: 6g
- Cholesterol: 0mg


Leave a Comment