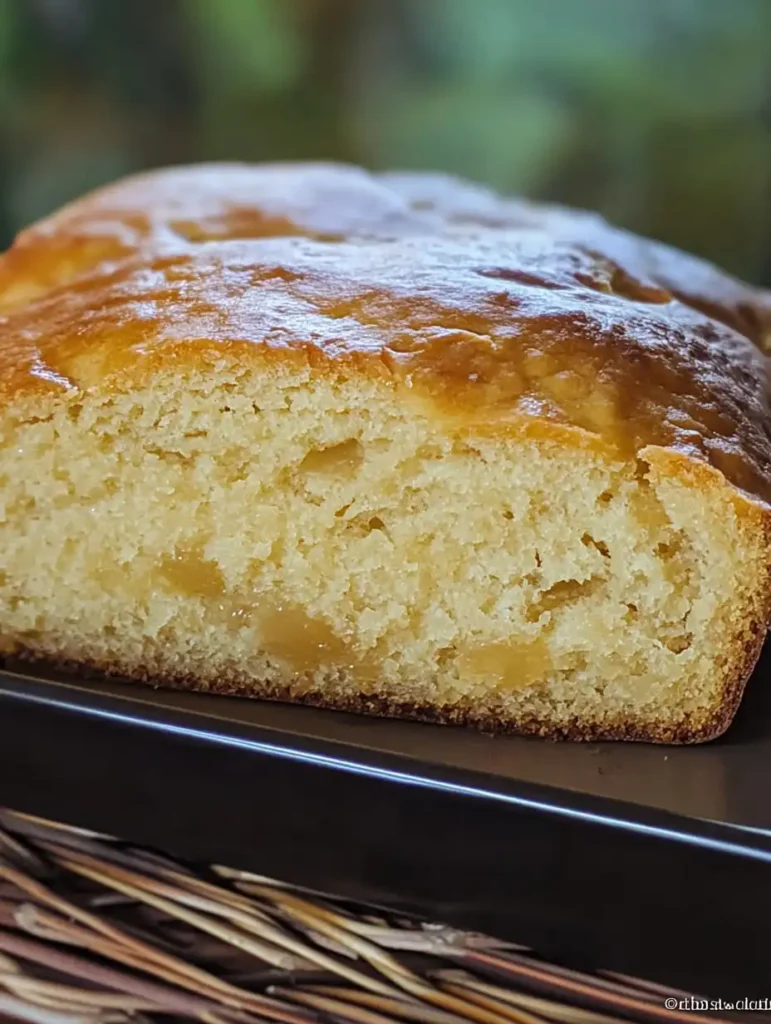
If you’re a fan of soft, fluffy, and slightly sweet bread with a hint of tropical flavor, then Hawaiian Sweet Bread is about to become your new favorite treat. Perfect for breakfast, sandwiches, or simply enjoying on its own with butter, this bread is a crowd-pleaser that will have everyone asking for seconds.
The best part? You can easily make it at home with this simple and foolproof recipe!
Why You’ll Love This Recipe
This Hawaiian Sweet Bread recipe combines the perfect balance of sweetness and a subtle tropical twist, thanks to the addition of pineapple juice. It’s a versatile bread that works well for any occasion, whether you’re hosting brunch or just want to elevate your daily bread game. Plus, while the bread maker helps with the dough, you’ll finish it in the oven for that authentic homemade touch.
Ingredients You’ll Need
To make two loaves of this delightful bread, gather the following ingredients:
- 2½ teaspoons active dry yeast
- 3 eggs, slightly beaten
- 1 cup pineapple juice
- ⅔ cup white sugar
- 1 teaspoon vanilla extract
- ½ cup butter, melted
- 6 cups bread flour
These simple pantry staples come together to create a bread that’s soft, fluffy, and just sweet enough.
Step-by-Step Instructions
1. Prepare the Dough
Start by placing all the liquid ingredients into your bread maker pan: slightly beaten eggs, pineapple juice, melted butter, and vanilla extract. Add the sugar as well and stir everything gently to combine.
Next, add the bread flour on top of the liquid mixture. Be sure to follow your bread maker’s instructions to properly add the yeast—most machines recommend creating a small well in the flour and placing the yeast there.
2. Let the Bread Maker Do Its Magic
Set your bread maker to the dough cycle and let it work its magic. This step kneads the dough and allows it to rise perfectly. Keep in mind that this recipe makes enough dough for two loaves, so it won’t fit in the bread maker for baking.
3. Shape and Prepare for Baking
Once the dough cycle is complete, remove the dough from the bread maker. Split it evenly into two portions and place each portion into a greased loaf pan. Cover the pans with a clean kitchen towel and let the dough rise in a warm place until it doubles in size (this should take about 30–45 minutes).
4. Bake to Perfection
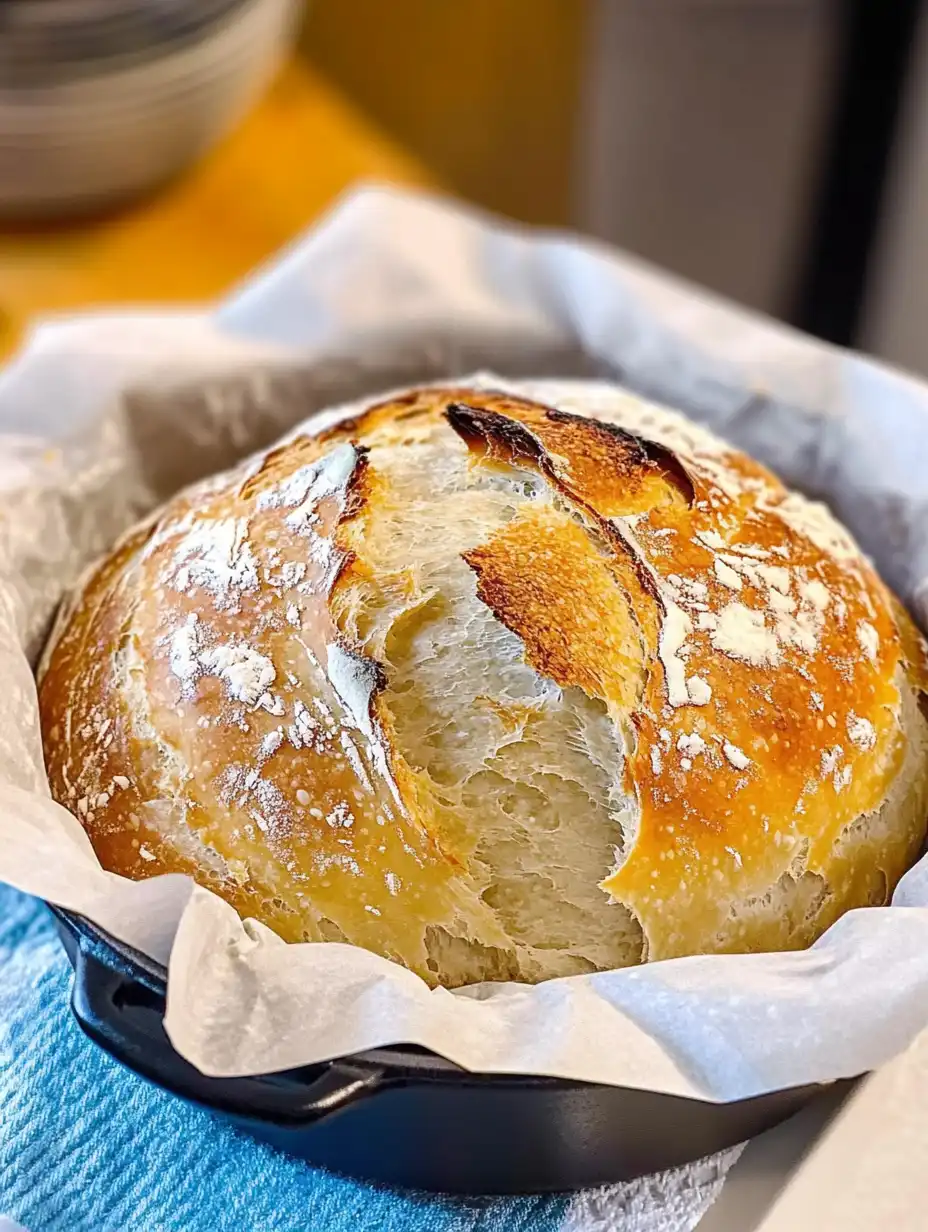
Preheat your oven to 350°F (175°C). Once the dough has risen, bake the loaves for 25–30 minutes. You’ll know they’re done when they’re lightly golden brown and sound hollow when tapped on the bottom.
5. Cool and Enjoy
After removing the loaves from the oven, let them rest in their pans for about 10 minutes. Then, carefully turn them out onto a cooling rack to cool completely before slicing. Trust me—it’s worth waiting for!
Tips for Success
- Use Fresh Yeast: Make sure your yeast is fresh and active to ensure proper rising.
- Don’t Skip the Pineapple Juice: This ingredient is key to achieving that signature Hawaiian Sweet Bread flavor.
- Be Patient with Rising: Allowing enough time for the dough to rise is essential for fluffy, airy bread.
- Customize Your Loaves: Sprinkle sesame seeds or shredded coconut on top before baking for an extra touch of flavor.
Serving Suggestions
Hawaiian Sweet Bread is incredibly versatile! Here are a few ideas for serving:
- Breakfast Treat: Spread with butter or jam for a simple yet satisfying start to your day.
- Sandwich Bread: Use it for ham and cheese sandwiches or even as a base for sliders.
- French Toast: Its slight sweetness makes it perfect for decadent French toast.
- Snack Time: Enjoy a slice on its own—it’s that good!
Conclusion
Making Hawaiian Sweet Bread at home is easier than you think, and the results are well worth the effort. With its soft texture, subtle sweetness, and hint of tropical flavor, this bread is sure to become a favorite in your household. Whether you’re enjoying it fresh out of the oven or using it as a base for creative recipes, this homemade treat will never disappoint.
So what are you waiting for? Grab your ingredients, fire up your bread maker, and let’s get baking! If you try this recipe, be sure to share your thoughts or any creative twists you added in the comments below. Happy baking!
PrintHawaiian Sweet Bread

Soft, fluffy, and slightly sweet, this Hawaiian Sweet Bread is made with pineapple juice, eggs, and butter for rich flavor. Perfect for dinner rolls, French toast, or as a simple sweet treat. This version uses a bread machine for the dough and finishes in the oven for a perfect bake.
- Prep Time: 2 hours
- Cook Time: 30 minutes
- Total Time: 2 hours 30 minutes
- Yield: 2 loaves
- Category: Bread
- Method: Bread Machine, Oven
- Cuisine: Hawaiian
- Diet: Vegetarian
Ingredients
- 2½ teaspoons active dry yeast
- 3 eggs, slightly beaten
- 1 cup pineapple juice
- ⅔ cup white sugar
- 1 teaspoon vanilla
- ½ cup butter, melted
- 6 cups bread flour
Instructions
Place all liquid ingredients and sugar into the bread maker pan.
Stir to combine.
Add the flour on top of the liquid and place the pan in the bread maker.
Follow the machine’s directions to add the yeast.
Use the machine only to make the dough.
Once the dough is ready, split it into two greased loaf pans.
Bake at 350°F for 25–30 minutes, or until lightly browned and the bread sounds hollow when thumped.
Let rest in pans for 10 minutes before turning out onto a cooling rack.
Enjoy!
Notes
This recipe makes 2 loaves, which may be too much volume to bake in most bread machines.
Great for sandwiches, toast, or served warm with butter.
Nutrition
- Serving Size: 1 slice
- Calories: 210 kcal
- Sugar: 9 g
- Sodium: 95 mg
- Fat: 6 g
- Saturated Fat: 3.5 g
- Unsaturated Fat: 2 g
- Trans Fat: 0 g
- Carbohydrates: 34 g
- Fiber: 1 g
- Protein: 4 g
- Cholesterol: 35 mg
The best part? You can easily make it at home with this simple and foolproof recipe!
Why You’ll Love This Recipe
This Hawaiian Sweet Bread recipe combines the perfect balance of sweetness and a subtle tropical twist, thanks to the addition of pineapple juice. It’s a versatile bread that works well for any occasion, whether you’re hosting brunch or just want to elevate your daily bread game. Plus, while the bread maker helps with the dough, you’ll finish it in the oven for that authentic homemade touch.
Ingredients You’ll Need
To make two loaves of this delightful bread, gather the following ingredients:
- 2½ teaspoons active dry yeast
- 3 eggs, slightly beaten
- 1 cup pineapple juice
- ⅔ cup white sugar
- 1 teaspoon vanilla extract
- ½ cup butter, melted
- 6 cups bread flour
These simple pantry staples come together to create a bread that’s soft, fluffy, and just sweet enough.
Step-by-Step Instructions
1. Prepare the Dough
Start by placing all the liquid ingredients into your bread maker pan: slightly beaten eggs, pineapple juice, melted butter, and vanilla extract. Add the sugar as well and stir everything gently to combine.
Next, add the bread flour on top of the liquid mixture. Be sure to follow your bread maker’s instructions to properly add the yeast—most machines recommend creating a small well in the flour and placing the yeast there.
2. Let the Bread Maker Do Its Magic
Set your bread maker to the dough cycle and let it work its magic. This step kneads the dough and allows it to rise perfectly. Keep in mind that this recipe makes enough dough for two loaves, so it won’t fit in the bread maker for baking.
3. Shape and Prepare for Baking
Once the dough cycle is complete, remove the dough from the bread maker. Split it evenly into two portions and place each portion into a greased loaf pan. Cover the pans with a clean kitchen towel and let the dough rise in a warm place until it doubles in size (this should take about 30–45 minutes).
4. Bake to Perfection
Preheat your oven to 350°F (175°C). Once the dough has risen, bake the loaves for 25–30 minutes. You’ll know they’re done when they’re lightly golden brown and sound hollow when tapped on the bottom.
5. Cool and Enjoy
After removing the loaves from the oven, let them rest in their pans for about 10 minutes. Then, carefully turn them out onto a cooling rack to cool completely before slicing. Trust me—it’s worth waiting for!
Tips for Success
- Use Fresh Yeast: Make sure your yeast is fresh and active to ensure proper rising.
- Don’t Skip the Pineapple Juice: This ingredient is key to achieving that signature Hawaiian Sweet Bread flavor.
- Be Patient with Rising: Allowing enough time for the dough to rise is essential for fluffy, airy bread.
- Customize Your Loaves: Sprinkle sesame seeds or shredded coconut on top before baking for an extra touch of flavor.
Serving Suggestions
Hawaiian Sweet Bread is incredibly versatile! Here are a few ideas for serving:
- Breakfast Treat: Spread with butter or jam for a simple yet satisfying start to your day.
- Sandwich Bread: Use it for ham and cheese sandwiches or even as a base for sliders.
- French Toast: Its slight sweetness makes it perfect for decadent French toast.
- Snack Time: Enjoy a slice on its own—it’s that good!
Conclusion
Making Hawaiian Sweet Bread at home is easier than you think, and the results are well worth the effort. With its soft texture, subtle sweetness, and hint of tropical flavor, this bread is sure to become a favorite in your household. Whether you’re enjoying it fresh out of the oven or using it as a base for creative recipes, this homemade treat will never disappoint.
So what are you waiting for? Grab your ingredients, fire up your bread maker, and let’s get baking! If you try this recipe, be sure to share your thoughts or any creative twists you added in the comments below. Happy baking!

Leave a Comment